1. Home
  2. Docs
  3. Shop Setup
  4. Sell on website
  5. Adding Netcash Shop to your site

Adding Netcash Shop to your site

Table of contents

Adding your store to any website

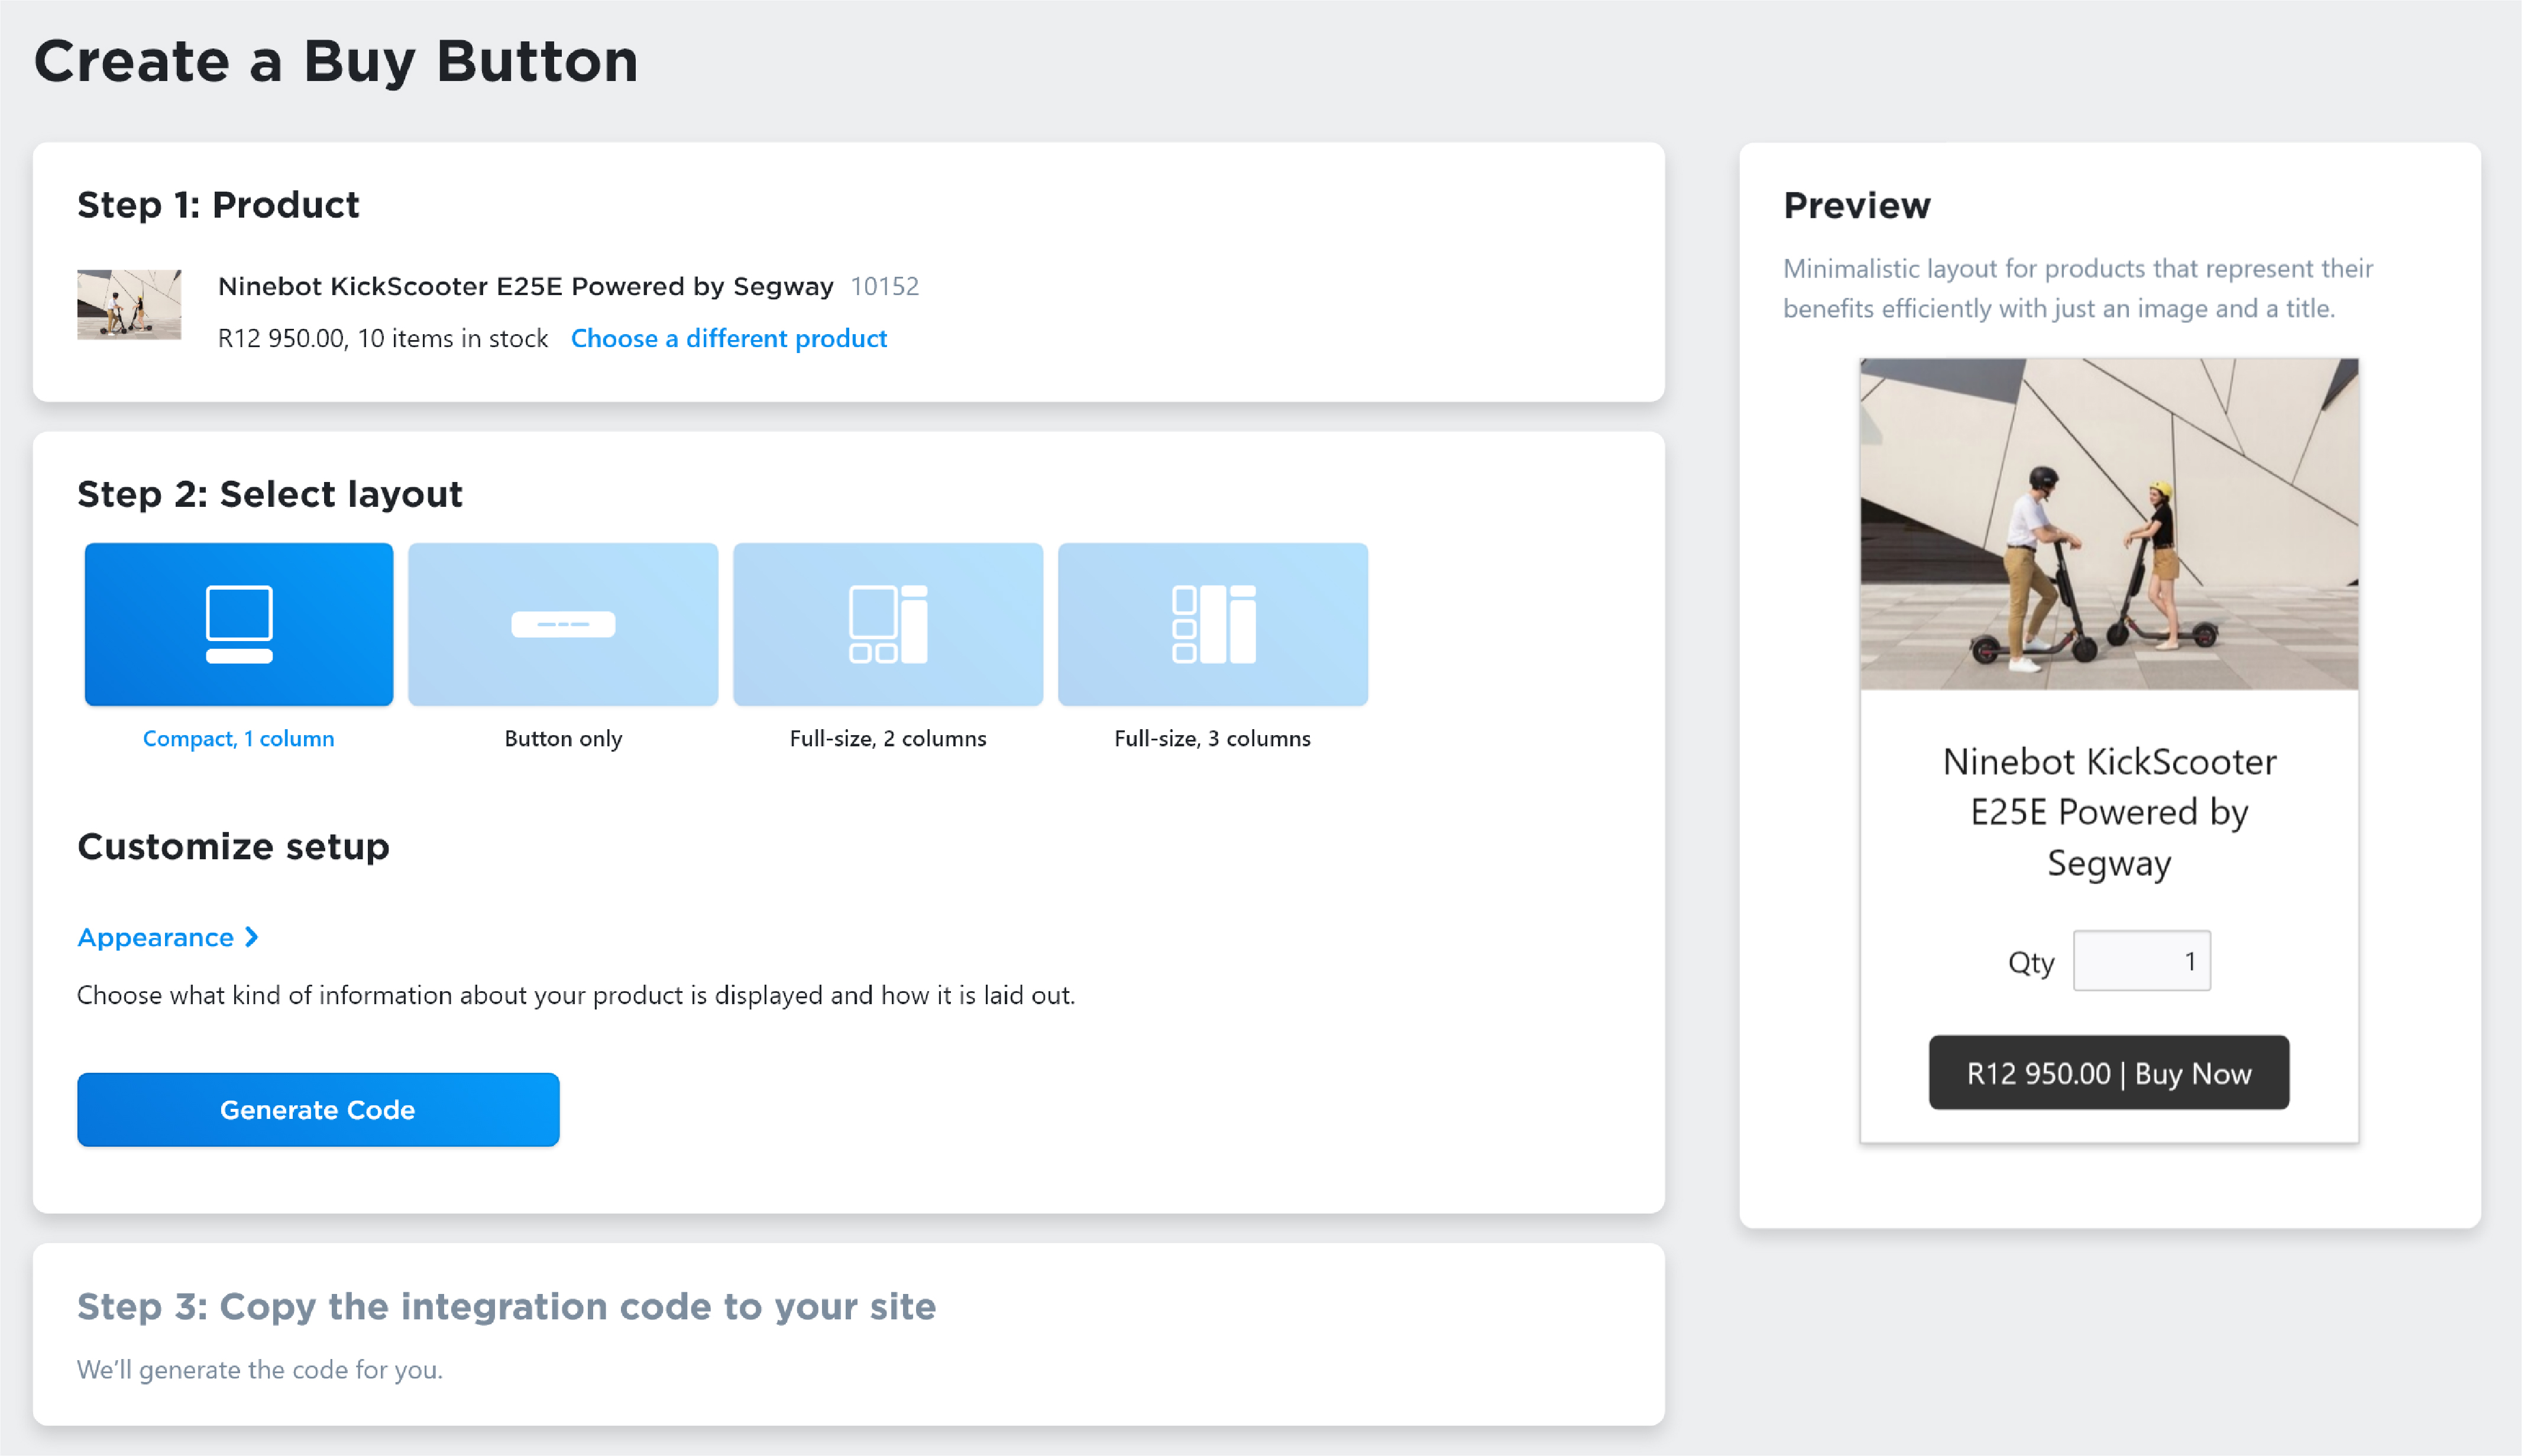
You can embed your entire online store, widgets, single product cards, or Buy Buttons to any existing website or blog in minutes. You will simply need to copy and paste the store code to your website page, and customers will be able to start purchasing right on your website. It’s as simple as copy and paste.


Adding an entire store to an existing website

You can add your entire online store to another website as long as you have the ability to add custom code to that site. There may be an HTML, source tab, or a special block or setting where you can add your store code.

Here are the general instructions on how to add an online store to a website:

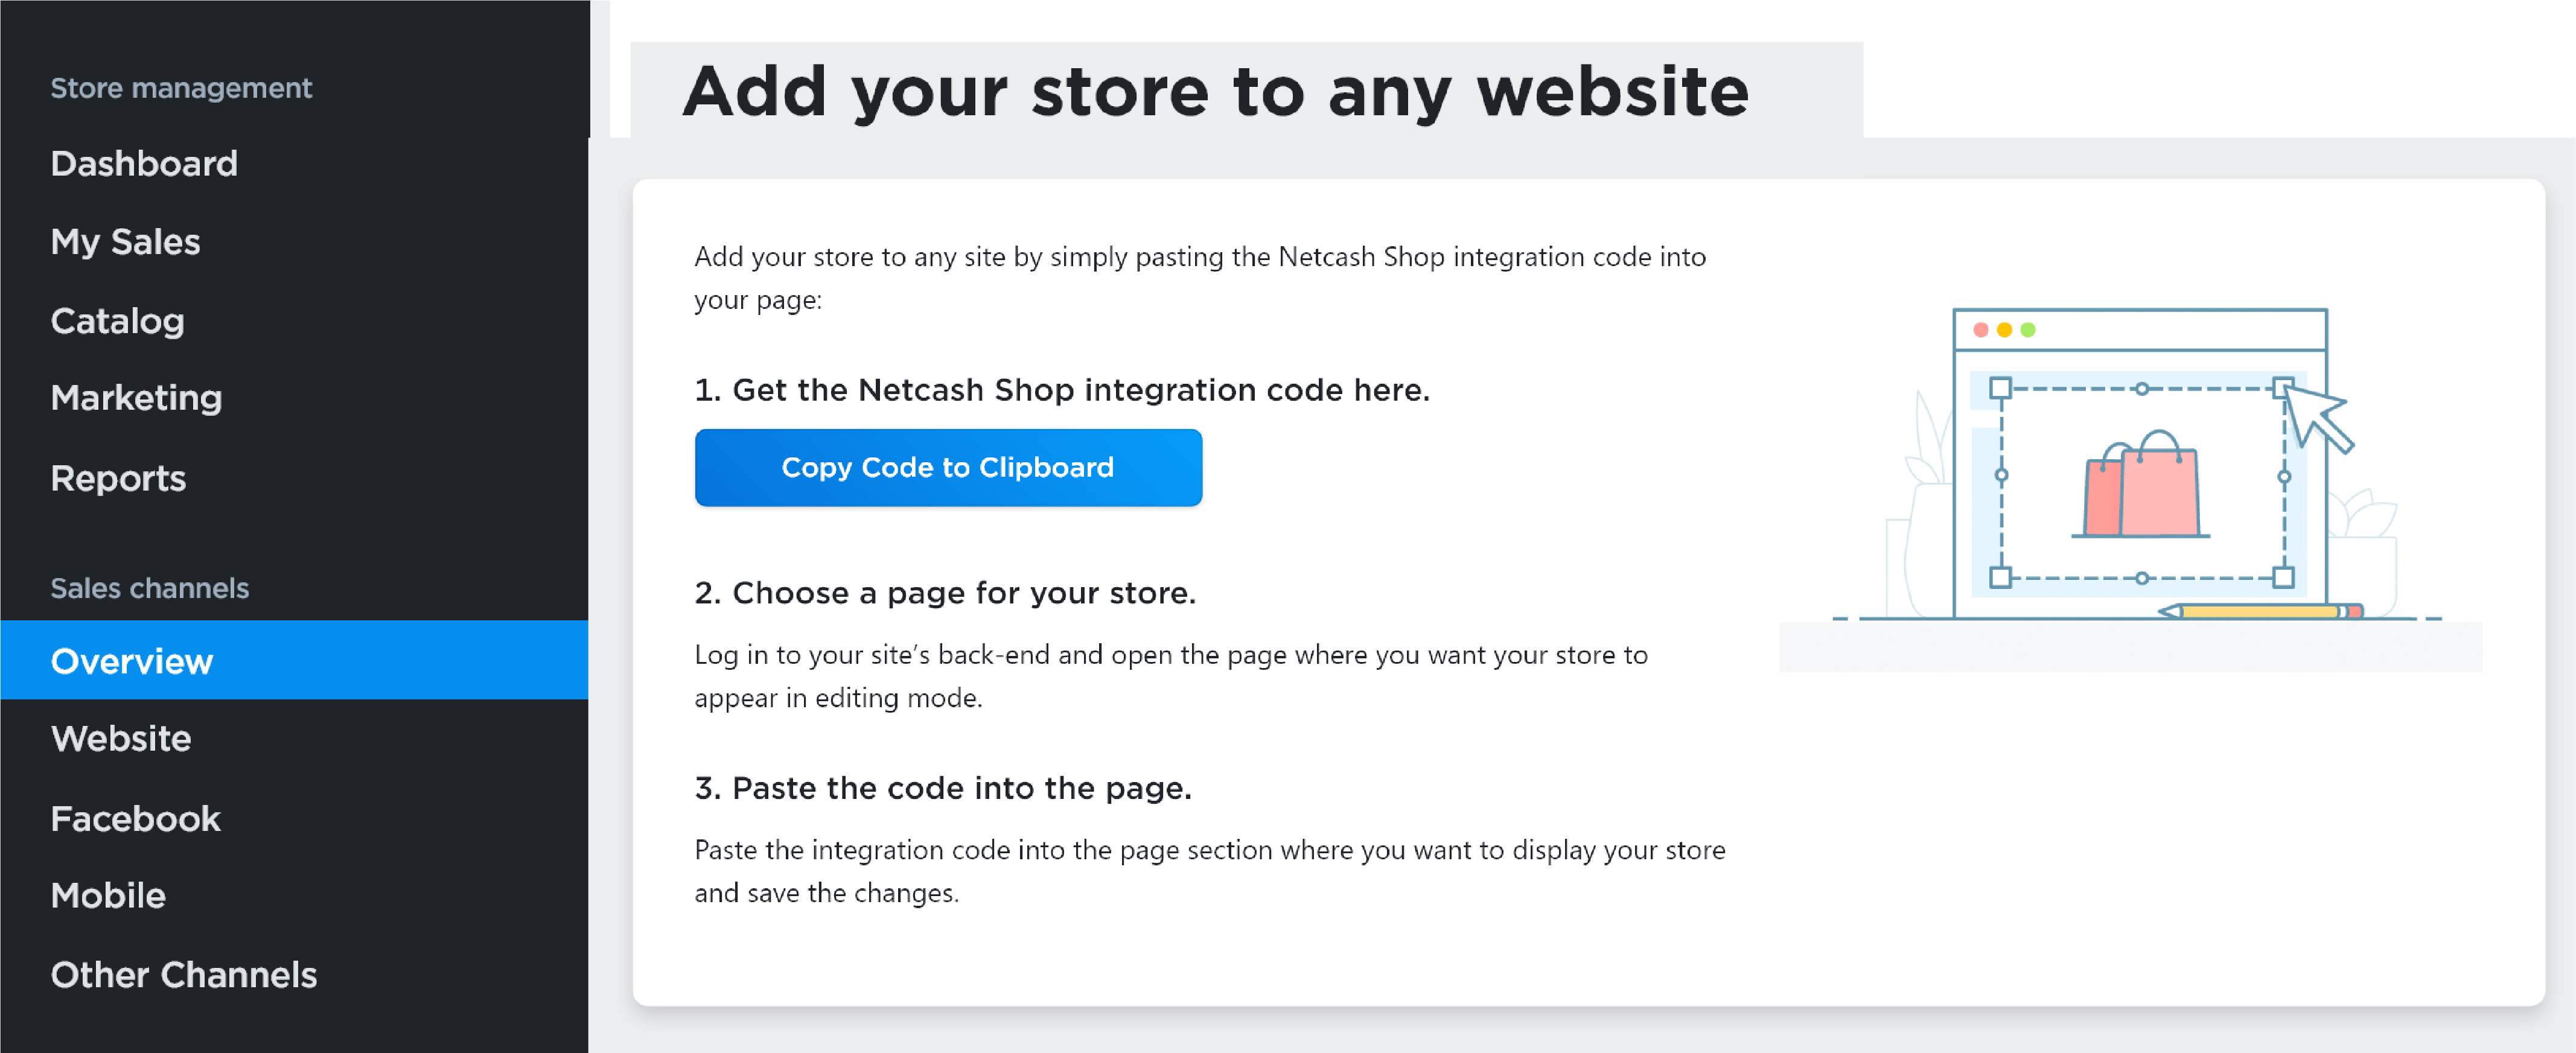
1. From your store admin panel, go to Sales channels > Overview.
Scroll to the “Sell on your website” section and click Learn more next to the “Custom website” section.

2. Click Copy code to Clipboard. This is the ready-made code for your store.

3. Go to your website editor and open the page where you want to display the store.

4. Paste the code to the source code for that page. There may be an HTML, source tab, or a separate button to add code – this will vary depending on the website. If you are not sure how to add custom code to your website, please contact your website developer for more detailed instructions.

5. Save and publish the changes.

6. After publishing, your store will appear on the website. Your customers can start placing orders, and you can start processing them.


Adding a category of products to an existing website

You can also add just a certain category of products to your website. This way you can show different products on different website pages or even on different websites. All of the orders will appear in your store admin panel or in your mobile apps for iOS or Android.

To show products from a certain category on your website:

1. Copy this code:

2. Replace STORE ID in the code with your store ID. You can copy it from the bottom of your store admin panel.

3. Replace CATEGORY ID in the code with the ID of the category that you want to add to the website. To find the category ID, go to your store admin panel and open the category you want to put on the website. Then copy the ID from the browser address bar. You will see numbers following “id=” — this is the product or category ID.

4. Add the updated code to the source code of your site page, save the changes and check the result.

That’s it. Now the category specified in the integration code will appear on your site. Repeat the above steps for other categories or to add a category to different site pages.


Adding Buy buttons / single product cards to an existing website

You can also sell products directly anywhere on your site by using the Buy buttons. You can add products to your blog page, sidebar, or any other place on your site. Customers will be able to place orders directly by clicking on the Buy button.

To add products individually, you will need to copy the desired product’s code and paste it to the website page where you want to show the product.

To add a single product to a website page:

1. From your store admin, go to the Overview page.

2. Scroll down to the Buy buttons card, then click Get Started and follow the wizard.

3. Use the search bar to pick a product you would like to embed.

4. Customise the Buy button’s layout and set up appearances. As you customise the button, you can preview your changes.

5. Click Generate code.

6. Click Copy code.

7. Now log into your website backend and open the page where you want to display the Buy button.

8. Paste the integration code to a page. Depending on your website, that may be an HTML or source tab or a separate button to add codes. If you are not sure how to add custom codes to your website, please contact your website developer for more detailed instructions.

9. Save and publish the page.

And you’re done! A beautiful product card or a Buy button is ready for your customers.