Enabling Google Analytics for your store
Connect your store to the free and powerful Google Analytics service to access valuable stats and insights into how your existing and potential customers find and use your store. You can connect your store to Google Analytics 4 or to Universal Google Analytics.
Google Analytics 4 (GA4) and Universal Analytics (UA) are completely different versions of Google Analytics that have different sets of reports. Unlike Universal Analytics that is based on sessions and pageviews, Google Analytics 4 is based on events and parameters and allows you more flexibility with custom report templates.
You can set up either GA4 or UA. However, UA will stop processing data on July 1, 2023, so this article will focus on GA4.
Creating a Google Analytics account and your store’s data stream
If you already have a Google Analytics account and a data stream for your store/website, you can proceed to the next section and connect it to your Netcash Shop.
If you don’t have a Google Analytics account, follow these steps to create it:
1. Go to https://marketingplatform.google.com/about/analytics
2. Click Get started today in the top right corner.
3. Sign in to your Google Account or create a new Google/Gmail account.
4. Click Start measuring.
5. Fill in your Account name.
6. Under Account Data Sharing Settings, check the boxes next to the options that you want.
7. Click Next to create a property.
8. Enter the property name (you can choose a name that suits you) and select a reporting time zone and currency.
9. By default, only a Google Analytics 4 property is created. This means you will need to enter your website URL later on in the setup process, if it is not asked for now.
10. Click Next.
11.Fill out the data about your business (optional), and click Create
12. Agree with the Google Analytics Terms of Service Agreement that opens.
Now you have a Google Analytics property for your site. As you’ve only created the Google Analytics 4 property, make sure to go to Admin → Data Streams → Web to create a stream for your Netcash Shop website.
If you did enter your website URL during the setup steps, you may already have a data stream due to the website being captured during account creation.
You can also check for more instructions on various setup options by viewing Google’s instructions on how to get started
Next, you’ll need to copy the Google tag ID and add it to your Netcash Shop admin panel to connect your Netcash Shop to Google Analytics.
Connecting your store to Google Analytics
It is really easy to connect your store to your Google Analytics account. You can use your Google Analytics 4 (a “G-” ID or a universal “GT-” ID) property ID.
When setting up Google Analytics 4, you get access to the opportunities of the brand-new Google tag, particularly to sending your store’s Analytics events to your Google Ads account. For that, Ads should be added as a Google tag destination, and the event should be a conversion event. Learn more about Google tag destinations →
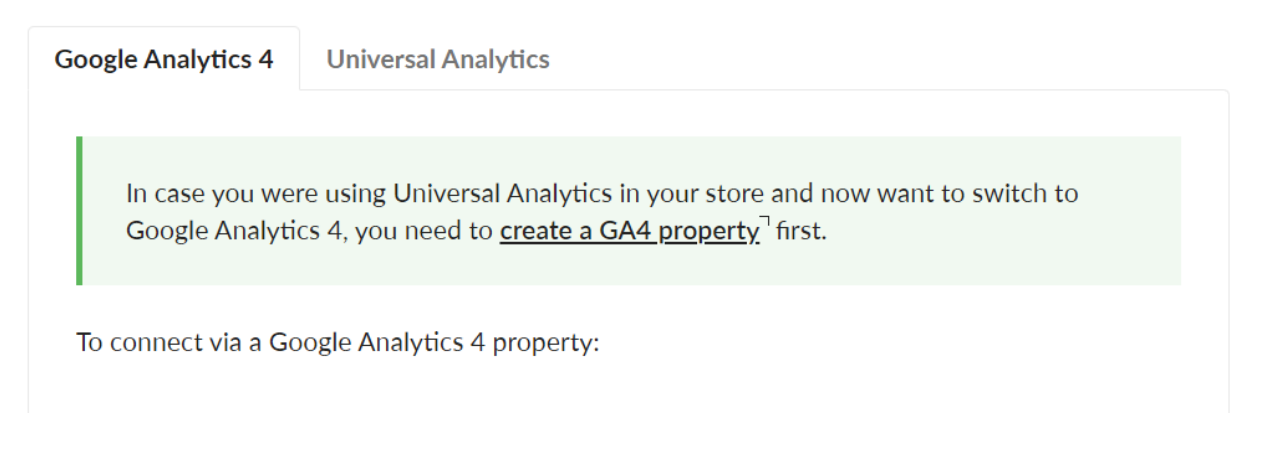
Google Analytics 4
In case you were using Universal Analytics in your store and now want to switch to Google Analytics 4, you need to create a GA4 property first.
To connect via a Google Analytics 4 property:
- Sign in to your Google Analytics account.
- In the menu on the left, click Admin.
- Choose your account and your GA4 property
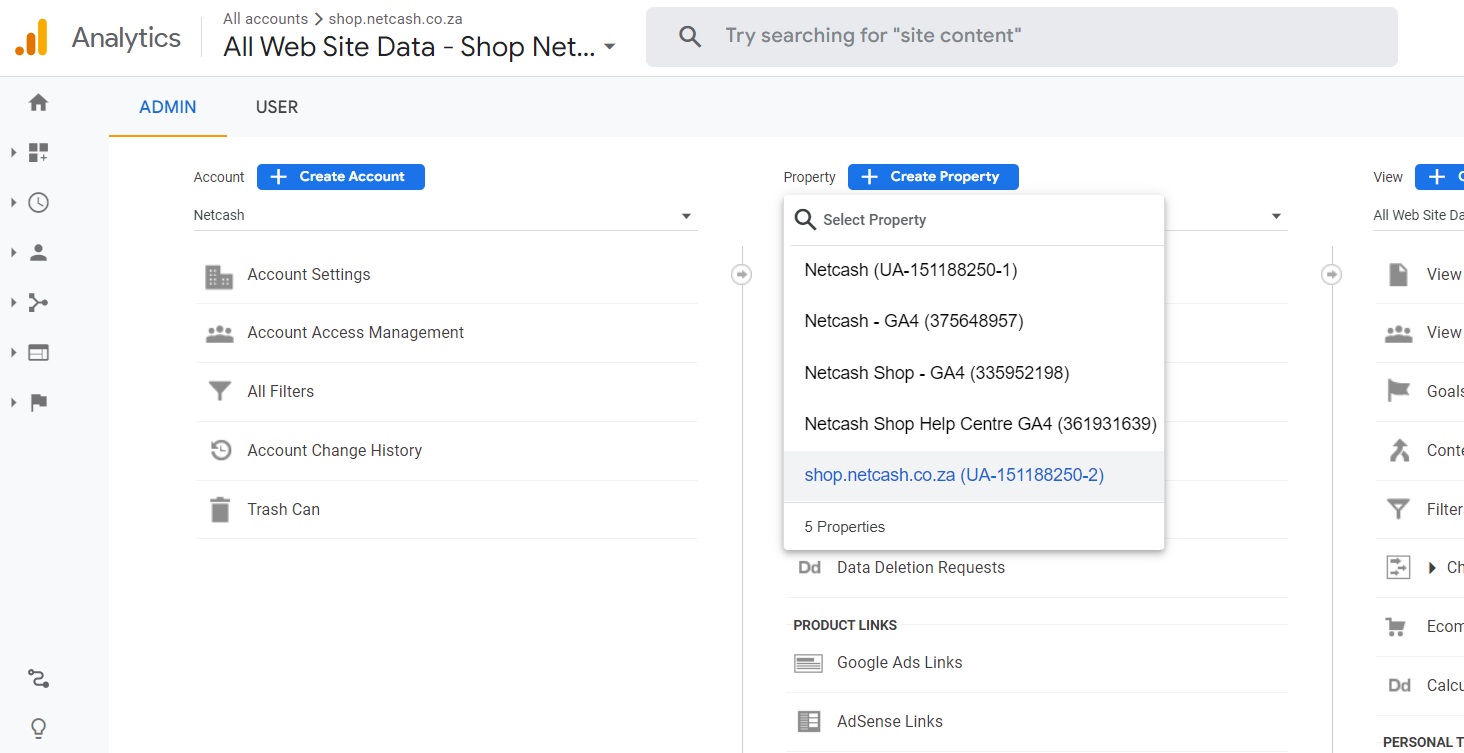
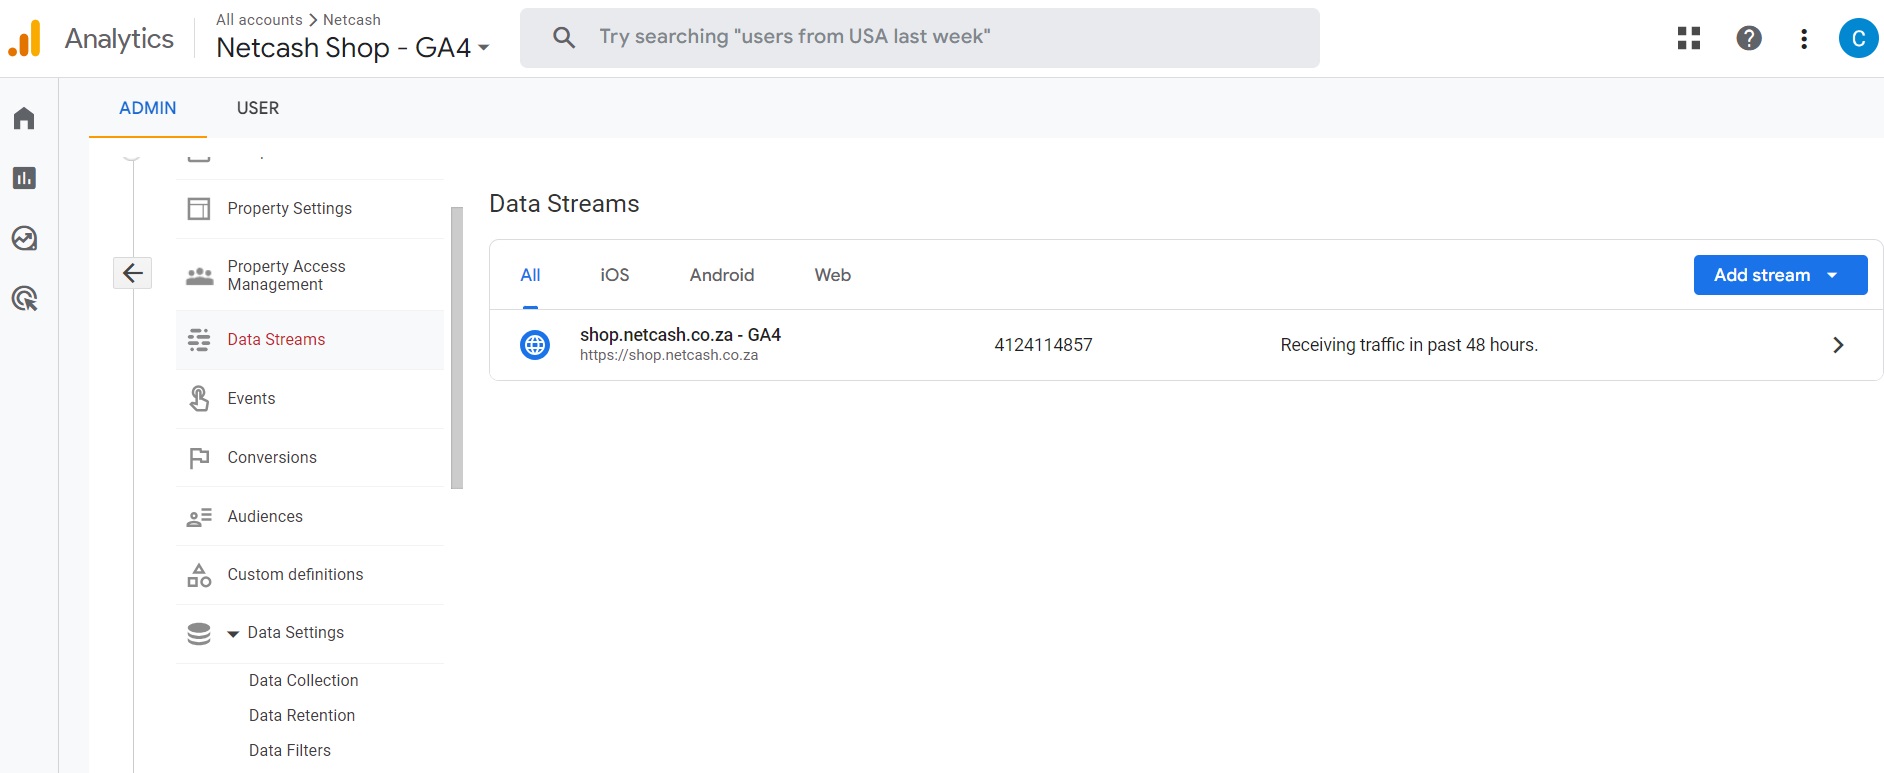
4. Proceed to Admin → Data Streams.
5. Click on the stream of your store/website:
● To use “G-” ID, copy the Measurement ID:
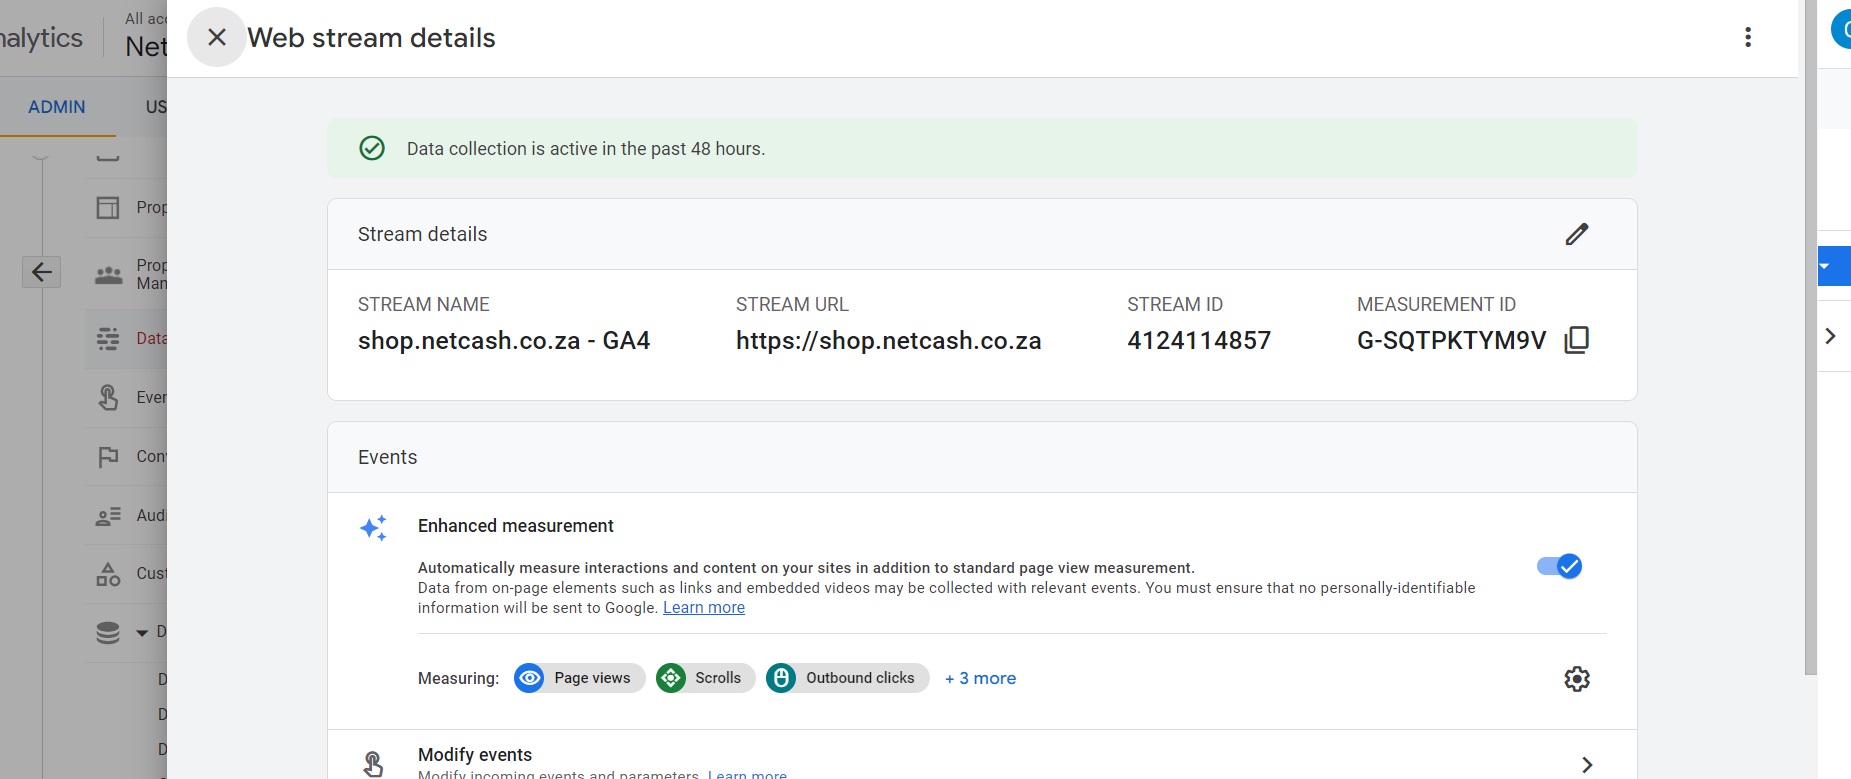
● To use “GT-” ID (available for properties created after July, 2022), scroll down and click Configure tag settings in the Google tag section, then copy your ID:

7. From your store admin, go to Settings → General → Tracking & Analytics.
8. Paste the ID you’ve copied in the Google Analytics ID field:

9. Click Save or press Ctrl + S to save the changes.
That’s it. You’ve connected your store to your GA4 account.
Now the following events can be tracked:
● page_view — views of store pages
● view_item_list (with parameters) — views of product categories, favourites or search results
● view_item (with parameters) — views of any product details page
● search (with search_term parameter) — searches by keyword
● login (with method parameter) — logins into customer accounts
● add_to_wishlist (with parameters) — when someone adds a product to favourites
● add_to_cart (with parameters) — when someone adds a product to cart
● remove_from_cart (with parameters) — when someone removes a product from cart
● share (with method and content_id parameters) – when someone shares a product using share buttons
● begin_checkout (with parameters) — when someone begins checkout
● add_shipping_info — when someone chooses a shipping method and proceeds with checkout
● add_payment_info (with parameters) — when someone chooses a payment method and presses the “Place Order” button
● purchase (with parameters) — when someone places an order
Note that the first results in Google Analytics reports will appear in about 24 hours.