You can set sale prices for individual products and product variations in your store. When you put an item on sale for a lower price, that value overrides the default price. So the original price is shown struck out, and the product gets the ‘ON SALE’ label.
On the storefront and on the product page, sale prices can be displayed as a percentage or as an absolute value.
Custom order statuses can be easily managed in your Netcash Shop admin panel on the Orders page, where you can set them manually, view them in order details, and use them for order filtering. Your customers will also be able to see custom statuses in order email notifications and in their accounts on your store.

Setting ‘Compare to’ prices for products
An item that is on sale needs to have the actual price it’s sold for and the original price, also called the ‘Compare to’ price.
If your product does not have variations, or you want to keep all your product variation prices identical, you only need to add the ‘Compare to’ price to the product itself.
To set ‘Compare to’ price for a product:
- From your store admin, go to Catalogue → Products.
- Open the product you want to put on sale.
- Set a new actual price in the Pricing field (if needed).
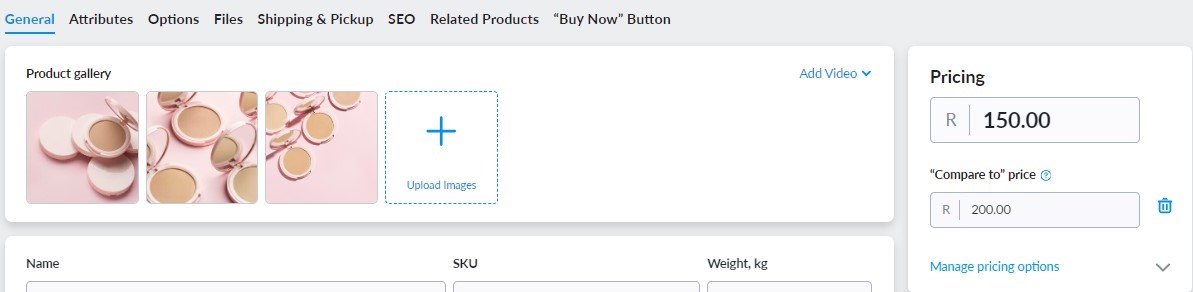
- Click Manage pricing options next to the price.
- Set the price in the ‘Compare to‘ price field. This value must be higher than the value in the Pricing field to show a sale price:
- Save changes.
- From your iOS app, go to Products.
- Tap the product you want to put on sale.
- Tap the price.
- Set a new actual price in the Price field (if needed).
- Set the price in the ‘Compare to’ price field. This value must be higher than the value in the Price field to show a sale price.
- Tap Done to save the changes.
- From your Android app, go to Products.
- Tap the product you want to put on sale.
- Tap the price.
- Set a new actual price in the Price field (if needed).
- Set the price in the “Compare to” price field. This value must be higher than the value in the Price field to show a sale price.
- Tap Save to save the changes.
That’s it! Your item that is on sale will now have the “ON SALE” label and the savings info both on the storefront and on the product page.
By default, product variation sale price mirrors the base product sale price. So if you set the “Compare to” price for your product, the same “Compare to” price is applied to all its variations. You can set individual sale prices for your variations if you need.
Here is how a product with a sale price will look in your store:

Setting ‘Compare to’ prices for product variations
You can set a separate sale price for each of the variations your product has.
After you add sale prices for individual product variations, customers will see the price of the default product variation when viewing your storefront. When they select a specific variation on the product details page, the sale price will be adjusted. If your product does not have a default product variation, the base product price is displayed at first.
To set ‘Compare to’ price for a product variation:
1. From your store admin, go to Catalogue → Products.
2. Choose the product.
3. Go to the Options → Variations tab.
4. Find a variation you want to put on sale, then click Manage.
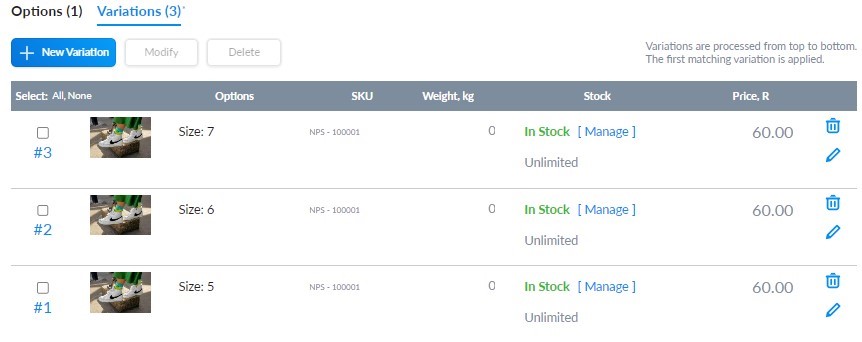
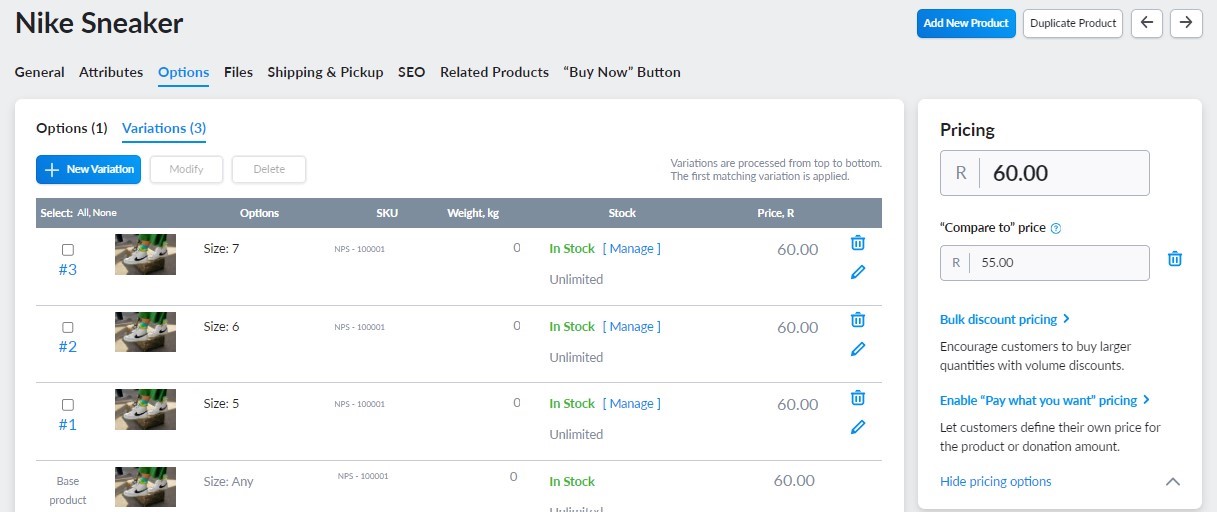
5. Set a new actual price in the Price field (if needed).
6. Click on the arrow icon next to the Price field.
7. Set the price in the ‘Compare to’ price field. This value must be higher than the value in the Price field to show a sale price.
8. Click OK, then Save.
- From your iOS app, go to Products.
- Tap the product.
- Scroll down to Options and Variations.
- Tap the variation you want to put on sale.
- Set a new actual price for your variation in the Price field (if needed).
- Set the price in the ‘Compare to’ price field. This value must be higher than the value in the Price field to show a sale price.
- Click Done.
- From your Android app, go to Products.
- Tap the product.
- Scroll down to Product options.
- Tap the variation you want to put on sale.
- Set a new actual price for your variation in the Price field (if needed).
- Set the price in the ‘Compare to’ price field. This value must be higher than the value in the Price field to show a sale price.
- Tap Save to save the changes.
That’s it! You’ve added a ‘Compare to’ price for an individual product variation. Now when a customer selects this variation on the product page, they will see the savings info for it along with the ‘ON SALE’ label.
Choosing the ‘Compare to’ price layout
You can choose how the sale prices look in your store: specify if savings are a percentage or an absolute value, where the price is displayed, and with what wording.
To set the sale price layout:
- From your store admin, go to Settings → General → Cart & Checkout.
- Scroll down to the ‘Compare to’ price section.
- Make the necessary changes.
- Click Save.

You can additionally change the default text on the ‘ON SALE’ label (e.g. to ‘Reduced price!’).
Setting ‘Compare to’ prices in bulk
You can easily set sale prices in your store in bulk. For example, when running a holiday sale.
First, you can add or update ‘Compare to’ prices with the Bulk Product Editor. Second, you can instantly set ‘Compare to’ prices based on your current product prices.
Setting sale prices with the Bulk Product Editor
Bulk Product Editor allows you to apply different changes to products and their variations. Product info is presented in a tabular form which makes the mass editing process easy to handle.
To add sale prices in bulk:
- From your store admin, go to Catalogue → Products.
- Tick the products you want to update (you can click Filter in the left upper corner to use filters and make the search faster).
- Click Bulk Edit Selected.

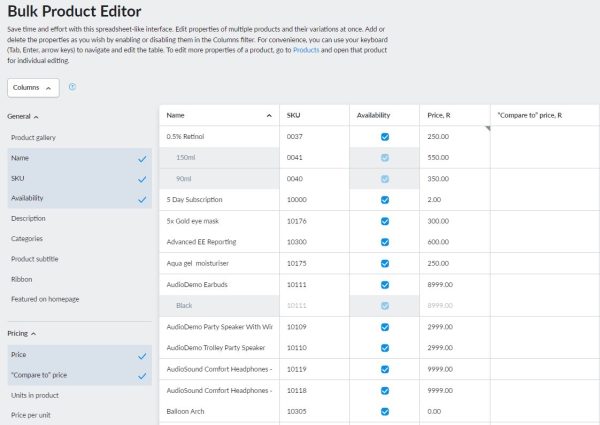
- You will be redirected to the Bulk Product Editor page.
- In the Columns section on the left, select Price and ‘Compare to’ price column.
- Click the Price cell in the row of the product or product variation and enter the new actual price you want to sell for during sale.
- In the “Compare to” price cell, enter the original price before sale.
- Click Save.
The value in the ‘Compare to’ price cell for a product or product variation should be higher than the value in the Price cell.
That’s it! The prices for selected products and product variations in your catalogue are updated, and your customers will now see sale prices in your online store.
When the sale is over, you can similarly use the Bulk Product Editor to remove the ‘Compare to’ prices and set new actual prices.
Setting sale prices based on your current product prices
You can instantly set ‘Compare to’ prices for selected products using the Mass Update option on the Catalogue → Products page. The ‘Compare to’ prices will be calculated based on your current product prices. This option works best if you want to apply the same change to multiple products at once.
To set sale prices:
- From your store admin, go to Catalogue → Products.
- Tick all the products you want to update (you can click Filter in the left upper corner to use filters and make the search faster).
- Click Mass Update → Set Up Pricing → Set “Compare to” Price for Selected.

4. In the dropdown menu, choose whether you want the discount to be a percentage or an absolute value:
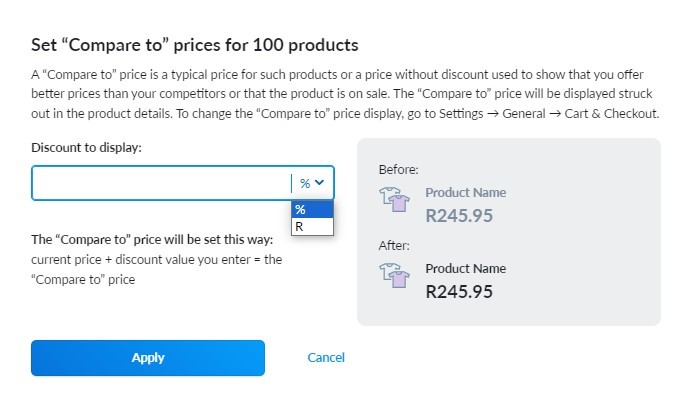
- Enter the discount value.
- Click Apply. The changes will be saved automatically.
‘Compare to’ price is calculated based on your current product price, so it’s ‘current price + the discount value’. The actual product price will not be changed.
That’s it! Now your products will have ‘Compare to’ prices that are higher than their current prices by the discount amount you’ve entered. Customers will see that these products are on sale.
If later you want to remove “Compare to” prices in bulk, you can do this by clicking Mass Update → Set Up Pricing → Remove ‘Compare to’ Price from Selected for selected products.