Add Enriching and Interactive Elements to the description
Text isn’t the only type of content that helps describe a product. Use tables, icons, graphics, or videos to showcase your product and make it easier for a customer to navigate and consume your content.
Adding Images

You can upload images from your computer to insert them into your text.
To insert an image:
1. Click the image icon in the text editor menu
2. Either drag and drop the file you need or click Choose file
3. Select a file on your computer and click Open.
4. You can also drag and drop the picture from your computer right into the text field.
Double-click the image if you want to resize it.
Supported files are JPG, BMP, PNG and GIF image file formats. The maximum upload image size is 10MB
Adding Videos
To showcase your product and help customers make a well-weighted decision or to make your instructions more helpful,you can include a video in your description.
The Text editor supports Youtube or Vimeo videos.

To insert a video:
- Click the video icon in the editor menu.
- Enter a video embed code or an external link.
- Click Insert. The video will be inserted automatically into the text field.
You can also simply enter the video address or an embed code right into the text field.
Add links
You can add clickable links to external websites and/or to the pages from your Netcash store. An example of this would be linking to your sizing chart that is listed on another page within your website..
To insert a link into your text:
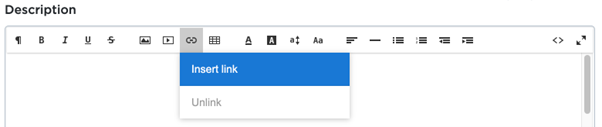
- In the text editor menu, click on the link icon, then click Insert link.
- Insert the URL
- You can choose to ‘Open Link in New tab’
- Click Insert.
You can also select a piece of text and click the link icon in the menu to add a link to this text. To remove the link, select the text and then click Unlink.
Adding collapsible blocks to product descriptions
Collapsible blocks, also called “accordion blocks,” help organize product descriptions by grouping information into expandable sections. Customers can click or tap to reveal details, keeping the page visually clean and easy to navigate while still offering comprehensive product information.
You can add all types of formatted text, along with images, videos, tables, etc., to your blocks.
To add a collapsible block to a product description:
1. In the text editor menu, click on the Collapsible text block button.

2. Enter the block title.
3. In the block description section, enter the content you want to hide inside the clickable block.
4. Now product information will appear in the form of titles that customers can click on to view the details.
Edit your text in the HTML mode
For advanced users who want to edit the description source code, the text editor has HTML mode. Click <> in the upper right corner of the editor menu to edit your texts using HTML:

Examples of what you can do using the HTML mode:
- Make clickable images
- Using extra colour for text that are not available in the standard text editor