
eCommerce for services | Sell your services online and increase revenue
September 6, 2023
WhatsApp advertising & selling for small businesses in SA
September 8, 2023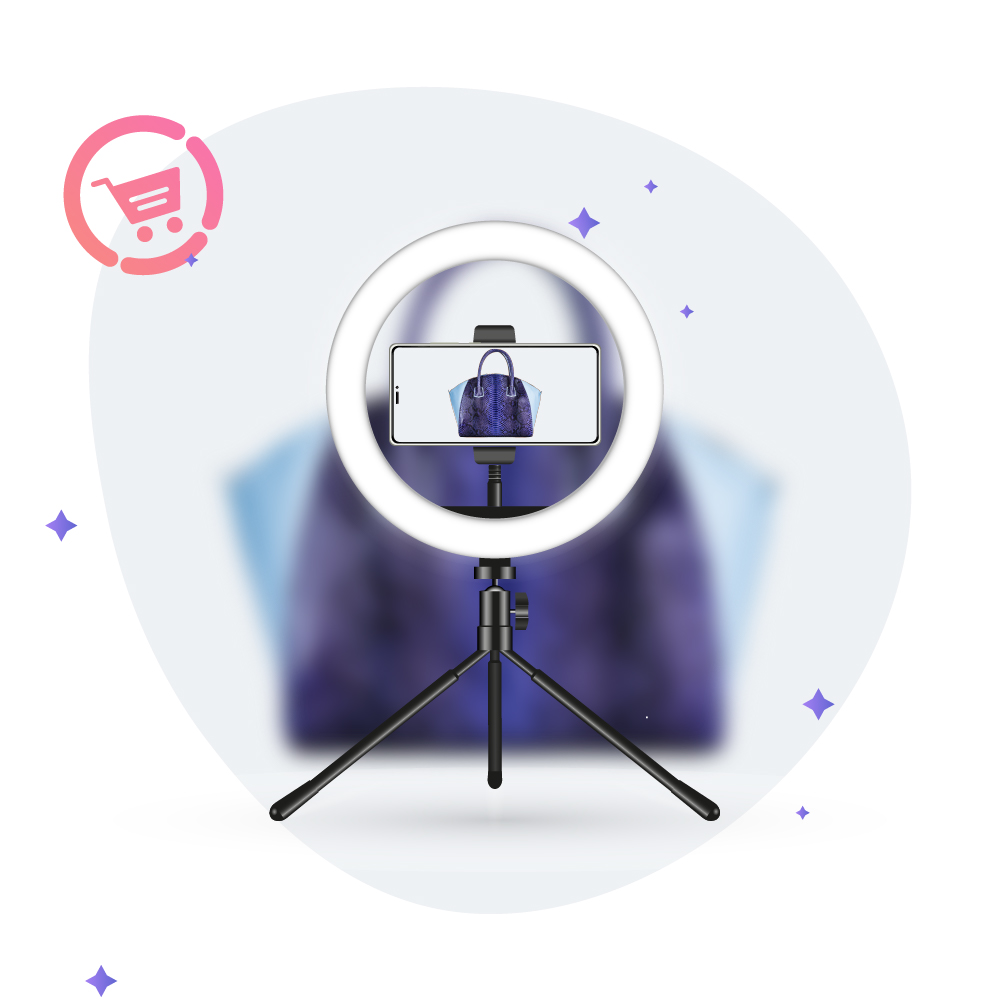
If you’re a small business selling products to the public, we’ll assume you’ve already tried every trick in the book to showcase the items you’re selling to the best of your ability. There are so many benefits of selling online, but one con is that customers can’t physically see or touch what they’re looking to buy.
So, eCommerce stores are left needing to entice their customers to buy products simply by the way they look and are described on a webpage. For small businesses, this can be much too costly and time-consuming if you’re not sure where to start or how to do this.
But our goal at Netcash is always to see small South African online businesses thrive, so we’ve compiled this guide just for you. Read on to learn more about why it’s worth investing in eCommerce photography, how it is best done, and some tips and tricks to do it yourself.

Index
- What is eCommerce photography?
- Best practices for eCommerce product photography
- How do I edit photos in eCommerce?
- Optimising images for online
- Trends in eCommerce photography
- Photography for social media vs. eCommerce
- More FAQs about eCommerce photography
- Photography for eCommerce products | Final thoughts

What is ecommerce photography?
Photography for eCommerce is quite literally what it sounds like. It’s taking high-quality images of your products, capturing their finer details and what makes them worth buying, and adding them to your eCommerce website.
There have been studies that show just how important product photography can be for any sized eCommerce store. You’re never too small to start thinking about a strategy for perfect picture-taking.
But anyone can put a product in front of a white background, snap a pic, and upload it. When you’re dealing with effective product photos for ecommerce, you want the photos to really sell the product.
These eCommerce product photos replace the customer’s experience of walking into a store and touching the products. So ensuring that you get multiple angles, show how the product is used, and steer away from any ‘false advertising’ will equal sales as well as returning customers.

The benefits of ecom photography
Did you know that 67% of consumers state that the quality of product images is essential when choosing a product on eCommerce sites?
But if you’re still wondering, “Is eCommerce photography really worth investing my time and money in?” The only way to convince you is by looking at all its benefits.

1. It’s good for SEO
High-quality product photos can positively impact search engine optimisation (SEO). This includes better user experience, faster page load times, and added ranking opportunities. In general, images can generate a lot of Web traffic from image-based search engines like Google.
So, when you optimise product photos for search engines, you can drive more organic traffic to your online store. Pages with several images can also generate more keyword searches than those with fewer images. All-in-all, quality product photos are vital for driving traffic to your site and converting visitors into customers.
2. Helps establish brand identity
Ecommerce product photography is one of the best ways to develop a clear brand identity. Words can only do so much, your business needs a visual representation of what it is, what it stands for (ideology and values), and offers. An identity allows customers to connect to your brand on a more personal level, which results in trust and loyalty — both are key factors to a successful online business.
How you style your product photos, from the themes to the colour palettes, can all help build a brand identity. Think about images and visual aesthetics as the first impression visitors will have when landing on your site. So, you’d want it to look high-quality, eye-catching, and aesthetically-pleasing.
For example, if your brand is geared towards eco-friendliness, you’d want your product images to reflect these values. You can achieve this by using natural backdrops with lots of greenery to give off an “organic” feel.
3. Helps reduce return rates
Return rates have plagued many small online businesses in recent years, with at least 30% of all products ordered online returned compared to 8.89% in brick-and-mortar stores. The good news is that high-quality product photos taken from different angles can help reduce return rates.
How this works is that low-quality, low-res, and distorted images are not a true representation of what customers expect to receive in real life. Shots that are blurry, poorly framed, or inconsistent across the website make your brand look untrustworthy and unprofessional.
This understandably leads to many returns and can cause businesses to lose valuable customers. With ecom product photos it should be what you see is what you get. If you want to increase sales, it’s best to provide plenty of good quality product photos that are accurate.
4. Boosts online visibility
Besides converting visitors into customers, there’s one thing ecom product photography can help with before that: attracting new customers. Eye-catching product images can boost online visibility and brand awareness.
5. It encourages sales
One major setback about shopping online is that your customers can’t wear, try, or feel the products before purchasing. As a result, they will heavily rely on visual content, and if your visual content isn’t up to par, converting customers becomes a challenge. So, if you can produce professional product photos, you’ll increase your chances of convincing customers to purchase your product.
6. Helps you to stand out from the competition
Since 93% of customers consider visual appearance a key deciding factor when shopping online, it only makes sense to provide outstanding product images. The higher the quality, the more creative, and the more alluring your photographs, the more you’ll stand out from your competition. So not only does photography for eCommerce build trust with your customers and improve brand loyalty, but it can also give you an edge when competing with other sites.
Best practices for eCommerce product photography
So how do you capture bright and enticing images while showcasing your product’s best features, alongside its smaller details and even how it’s used? It sounds like a lot, but there are a few standard practices that can help you turn your small setup in the back office into a professional product photoshoot.
Choose a good location
Perhaps the most important part of your DIY photoshoot for eCommerce is where you’re taking the photos. Depending on what you’re selling, you first want to make sure that the spot you’re using is big enough to fit your products. Smaller products mean you can probably just use a good corner of a room, but you may also need to be outside if your products require so.
Once you have an idea of how much space you need, the next thing to consider is lighting. You can use natural light if the weather and your time allow it. But if you don’t have a large window to light up the room, or you’re pushed to do your online store photography at night, then you’ll need artificial lighting – which we’ll discuss in the next point.

The right equipment is key
The basic equipment you’ll need includes:
- A camera (and possibly lens) – If you’re starting out small and you own the latest iPhone or Android smartphone, you can likely take decent product images using your phone’s camera. With good lighting and some editing, you’ll be able to use these until you can invest in a camera. But the best option would be an entry-level DSLR camera and a good lens.
- A tripod – If you really want to capture every detail of your product, invest in a tripod. You want something that you can adjust (in height and possible angle) so that your camera is secured and you can take sharp, stable images — and even videos.
- Lighting – As we mentioned above, this is incredibly important. While you can edit photos to be lighter, you really want to eliminate as much shadow as possible when shooting. You can use a ring light, softbox light, or LED light to illuminate your products evenly.
- Backdrop(s) – When you’re photographing ecommerce products, the goal is to focus on the product. So you want a distraction-free background. If you have smaller products, you can use lightboxes that combine your backdrop and lighting in one. For larger products, using a plain wall, sheets, and simple fabric are all great DIY options.
Focus on styling
While a good camera and the right lighting are essential for selling products online, the way you style your products in the shoot is just as crucial. What do we mean by styling? If you think of your products as ‘models’, it’s essentially how you pose them.
If you’re using models for your product shoot, that’s great too. But you want to make sure you’re showing all the best angles and sides of your products. This includes adding props — like if you’re selling a cooler bag, add some ice and a pack of cool drinks in your photo.
 More images = better user experience
Product photography for eCommerce is one case where less is never more. You’re trying to provide your customers with an experience that makes them feel confident in what they are buying, and one simple photo of your product is not going to do this.
Taking photos of your product from multiple angles, zooming in on important features, and even adding in a few photos with your products in ‘real world’ scenes can all help sales. Blending this with making visually-appealing images (think a roller skate company adding images of someone skating along a seaside promenade) will increase your customer’s trust and desire to buy.
A Note on the smartphone e-commerce photoshoot
Using your smartphone versus a professional camera isn’t too different. You still need to make sure your lighting is good, set up your tripod and select the best backdrop. But the settings on your phone are slightly different to that of a DSLR camera.
Your smartphone camera has a few settings that you can adjust before you snap your pictures. Once you have your phone on the tripod, and your product is in the right frame, set up your White Balance by tapping on the “WB” button and then on your white background. This will set the white balance against your setup.
Next, tap on the “Exposure” button and then on your product. This keeps the exposure on the product where you want it. Finally, do the same with the “Focus” button. Take a practice shot and make sure you’re happy with these settings — if not, adjust them until you are.
You can lock these settings in with one more tap on each button, but you’ll need to do this for each product. So take all of your photos of a single product before you replace it with the next.

Use the correct lighting
Good lighting is essential for eCommerce photography since it can literally make a difference between a photo that looks professional or not. Natural lighting is the way to go, especially for lifestyle photography. It’s also the best light source available and free.
However, if natural light isn’t an option for you, opt for softbox lights or ring lights to eliminate shadows and highlight the product’s features.
Retouch your photographs
After capturing all your images and choosing which ones will go on your eCommerce site, it’s time for post-production. Retouching these images is a necessary step to achieve high-quality, professional-looking product images across your site. You can colour-correct, adjust lighting, and remove unwanted objects — which we will get into in the next section.
Be consistent with your eCommerce photography
It’s essential to maintain a consistent style across all images on your ecom website. This will help establish a brand identity and make your site look amazing. There are a few key elements to focus on when creating a template or style.
For example, choose a colour palette that compliments your products or services and reflects your brand identity. Also, try and keep the saturation, focal length, composition, shadows and context consistent.
How do I edit photos in eCommerce?
Even with the most high-tech equipment and professional studio, product photos need to be edited. Sometimes this is simply fixing the lighting or adding a colour filter. But you also might want to remove the background of your image or add in some cool effects.
Alongside our important tools for eCommerce, these apps can help you edit your photos to look professional without much skill or experience needed.
For beginners: Canva
The basic Canva is free and incredibly easy to use. You can edit your photos with filters, crop them, and add watermarks if necessary. You can also save the images in Jpeg format and ensure that they are saved in a smaller file size.
If you have Canva Pro (±R109 per month), you can also use this app to remove backgrounds and do a bunch of other cool edits.

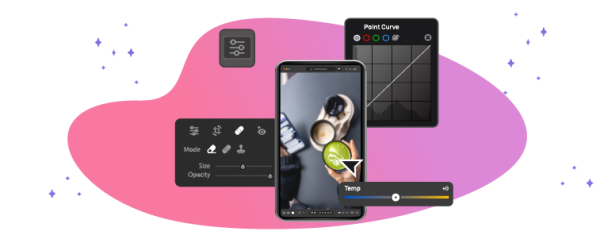
Quick and powerful: Adobe Lightroom
Adobe Lightroom has a large fan following thanks to its ease of use when editing photos. It’s available on your computer as well as on your smartphone, so you can edit on the move but also do more complicated editing on your laptop or PC.
This software is free to use, but there are a lot more perks if you decide to sign up for the Creative Cloud Photography plan at ±R200 per month.
A little more complicated: Adobe Photoshop Express
This is Adobe Photoshop’s little brother — designed to work perfectly on your smartphone. This app lets you adjust your photographs to perfection before you upload them to your store. Play around with exposure, contrast, brightness, and hue, all for free.
Other mobile editing apps
You can use these apps on your phone to edit your ecom photos — and mostly for free!
- Snapseed: Owned by Google, this tool is built for beginners and won’t have you confused or frustrated as you edit your images.
- BeFunky: An especially easy tool if all you need to do is resize your images, either in pixels or file size.
- VISCO: This app integrates social media photo edits really well, so you can use it to edit your product images for your Facebook and Instagram too.
Optimising images for online
When adding images to your website, it’s best to optimise them for user experience as well as to improve the SEO on your eCommerce site. There are a few things you can do before, during, and after uploading your product images to ensure your website offers customers the best experience. This will only lead to even more sales.
Upload images in the right format
When editing your images, you can save them in various formats, such as Jpeg, PNG, etc. The format you select will depend on the image, but if you have a product photo with a background, we suggest Jpeg. This will ensure a smaller file size while keeping the colours and details of the image clear and captivating.
PNG images are ideal for photos that have had their background removed, as these will upload with a clear background. But, this format does save with a much higher file size, so too many of these can be bulky on your ecom site.

Resize and compress your photos
The size of your images will depend on your website, but generally, a size of about 800x800px is ideal. This may differ according to the eCommerce platform you’re using. You can select the image size while editing in software like Canva or use a resizing tool to get them to the right size.
Another number to look out for is your file size. Images that are too big in KB will take up too much space on your website, cause slow loading speeds, and generally just aren’t good to upload. Compressing your images to a file size of around 200 KB should ensure that you still have good-quality photos, but your site won’t suffer.
Use optimised naming
Naming your photos will help you find and organise them, and with a sensical naming format, your photos can also improve your site’s SEO.
The first thing to remember is to use hyphens or underscores and not spaces in your image names. So choose “side-view-pink-candle” instead of “side view pink candle”. This is because when uploaded, those spaces turn into random characters, and then your naming process will no longer make sense.
Next, try to describe your image as best you can in as few words as possible. As with the example above, if you have three images of your pink candles, rather than having “pink-candle-one”, “pink-candle-two”, “pink-candle-three”; try something more like “pink-candle-front”, “pink-candle-back”, and “side-view-pink-candle”.

Add Alt Text
Alt text is just as important as naming (if not more). The Alt Text is a short description of the image – added as you upload it. It’s used by search engines to figure out what your image is about (since they can’t see images), but it’s also crucial for text readers that are used by customers with visual impairments.
Your alt text should be as descriptive as possible. For instance, using our candle example, if you have an image titled “pink-candle-front”, your alt text could be more like “pink candle on glass table with flame lit”.
ensive, especially for smaller businesses.
Trends in eCommerce photography
Although it’s always best to showcase your brand’s unique voice in your eCommerce photography, there’s something handy about watching trends from major retailers and using them to your advantage. Some ecom photography trends that have been popular in the last few years include:
Augmented reality
As technology improves, so do all of the wonderful ways businesses can use it. There has been a big increase in brands using AR to help sell their products.
Imagine your customer using their smartphone to overlay your newest cushions onto their couch at home to see if it fits their aesthetic before they buy. The possibilities are almost endless, but this can be expensive, especially for smaller businesses.

Videos & Gifs
These are really popular on social media, but videos and gifs can also work well on your eCommerce site. If you look at big retailers like Mr Price, they use Gifs really well on their online store.
Taking short videos of your product, perhaps showing each angle, zooming into parts, and even a snippet of someone using the product, can offer even more information to potential clients.
Videos can be a bit heavy on file size when uploading them to your website, so creating Gifs instead works — or uploading to Youtube and embedding the video in your product page.
360-Degree views
Much like taking photos of your product from every angle, a 360-degree view just makes this much easier for the customer. These seem pretty technical, but with a bit of skill, you can do 360-degree images from your iPhone using the Panoramic setting.
Another simple way to do this is by putting your product on a turntable and taking photos as you turn it slowly. Then you upload it into 360-degree photo software and create your full view for your customers.

Lifestyle photos
As we’ve mentioned, some products just do better with plain and simple backgrounds. However, lifestyle images allow customers to see your products in the real world, which helps them imagine how these products would help them in their own worlds.
Adding a lifestyle photo to your product gallery can increase customers’ interest and trust. So take your sun hats to the beach for a photoshoot, or place your quirky coffee mugs in a kitchen with a couple of chatty friends.
Inclusivity & diversity
This is especially important for businesses using lifestyle photos or models. Your customers want to feel like you are selling your product to them, so seeing themselves in those shoots is important.
From race, gender, and differently-abled bodies, ensuring that your product photos are both inclusive and diverse will open your brand to every customer that you hope to reach. This could be as simple as adding multiple body types wearing your T-shirts or adding a few dads modelling your baby carrier.

Mobile-first
Mobile has been taking over for a while now. Many of your customers will be shopping from their phones and not their computers. So it’s crucial to ensure your website and payment options are mobile-friendly, but also to create product photos that are mobile-friendly.
This generally means having vertical images that fit a phone screen rather than images that stretch across the screen and might be distorted on a smartphone.

User-generated content (UGC)
With permission, using UGC can increase engagement with a brand quite massively. This involves customers taking their own images of your products and sending them to you — you can then either share these on social media or upload them and credit the photographer.
But this isn’t just a way to get free photos. When your potential customers see how current customers are using the product, it helps them know your brand is trustworthy. UGC is like testimonials on steroids.
Many brands will reward customers for user-generated content by holding competitions or sending products to those willing to create these images.

Photography for social media vs. eCommerce
Your product photography shoot can double as social media content as well, but you’ll want to edit them slightly differently. In most cases, the goal of social media content is to engage with your customers and get them to engage with your brand.
Social media is also full of big and bright content, from images to videos and everything in between. So while your website images can be simple and to the point, social media images usually need to be a little more captivating.
If you’re selling online without a website, product images are still essential for sales. If the goal for your product photos on social media is to sell rather than just engage with your audience, then the same rules apply to these images. You want them to be clear and detailed, showcasing your products in a way that invokes interest as well as trust in your customers.

More FAQs about eCommerce photography
Why is product photography important?
Your product photos are what your customers are looking at just before they click “Add to Cart”. If these are not visually appealing and don’t showcase your product’s best features, you may end up losing a sale.
The more in-depth your images are, the more trust your customer has in their purchase. Plus, if your customers know what they are buying before it reaches them (and they’re not met with any surprises), there is a much lower chance of you needing to handle as many returns.
What are the different types of product photography for eCommerce?
Essentially, you can do your eCommerce photoshoot in a few different ways.
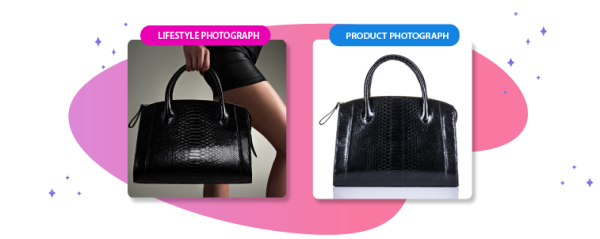
The first is “Product Photography” or “White Background Photography”, which focuses on highlighting the products and nothing else. It usually shows your product in a neutral setting or with a white background so that there are no distractions from what you are selling.
Another option is photographing your products in everyday situations, known as “Lifestyle Photography”, placing candles within a home setting or skateboards at the skatepark. This style helps tell a story about your product and your brand and can make the customer feel more connected to the products.
Then, you can also do “Product Packaging” shoots which show potential customers how products are packaged. This can showcase a product and its package in a way that can be used to advertise the product. Group shots show an item with complimentary products and other features which is a popular style for product bundles, upselling, and cross-selling.
Lastly, you can also try zoom or close-up product photography so that customers can see all the details. Zoomed-in shots help highlight specific features and showcase product quality— think of items like jewellery with fine details.
Each of these styles works great for different types of products. Some products don’t need explaining; some just make more sense in the real world.
How do I get good pictures for dropshipping?
If you’re dropshipping products, chances are you won’t ever really have these products in your hands (unless you buy them to test/use). So taking these photos yourself is virtually impossible. The best option in this case is to use the images your supplier already has, but ensure that they fit your site’s image and quality.
You would need to check with your suppliers for their regulations on images, but often it is best to use the images and edit them. You can change the backgrounds, make the images sharper or brighter, and even add your own logo (if this is permitted).
What is the best background for selling online?
There is no one-rule-fits-all when it comes to product backgrounds, although we would suggest you try to stay consistent throughout your website. Some products go much better against a white background, but if your product is simpler, it may really pop against a colour.
You could also use your brand colours for all of your product backgrounds or simply have no background at all (transparent). If it fits your brand and type of product, then you might want to consider having all of your photos in a real-life setting — i.e., If your product is made in Cape Town, you could do a beach photo shoot and have Table Mountain as the background for all.
Once again, consistency is most important here, and next is user experience. Whatever background you do choose, make sure that your customers can clearly see what you are selling and that your products are not drowning in their backgrounds.

How much does an eCommerce photoshoot cost?
If you’re not in the right space to DIY your eCommerce photo shoot, you could hire a product photographer in South Africa from almost anywhere across the country. But this can be costly, as many photographers charge by the hour.
Expect to pay anything from R1800 and up, depending on how many products you need to capture, where you are located, and whether or not you need the photographer to set up a studio space.
While it can be a large investment for a small business, if you do your research and book a real professional, you could get your money’s worth in fantastic images for your website.
Does eCommerce work in South Africa?
Yes, it’s a growing industry in South Africa, with 18.43 million eCommerce users currently. There 2020. Some of the top eCommerce websites are Amazon, Takealot.com and Bash.com. That said, most South Africans purchase mostly from South African websites, with only 25% purchasing from the United States and 14% from Europe.
So, if you were wondering if an eCommerce site and product photography are worth your time, you know that they can certainly become successful.

Photography for eCommerce products | Final thoughts
We know this can all seem a bit overwhelming when you’re starting out, but we promise it’s not as complicated as it seems. And the great thing with today’s technology is that you can continue to take your photos until you’re happy with them — no need to worry about running out of film.
Plus, with a bit of clever editing, you can fix up almost any flaw you may be seeing. You don’t necessarily need the fanciest equipment or years of experience to have a collection of top-quality eCommerce product photos.
If you’re selling products, visual elements are important to customers. And the more images you have, the more likely your customer is to buy from you. So if you haven’t yet added to your product page gallery, we suggest you start right now.
Up Next: Read up on how to sell clothes online if you’re in the fashion industry.

Author:
Candice Sergeant
eCommerce Product Owner
Stay in Touch
![]()
![]()
![]()
![]()
Candice Sergeant is an experienced eCommerce Product Owner at Netcash, driving the growth strategy for SaaS e-commerce solutions in South Africa with global partner Ecwid by Lightspeed. Candice is skilled at uncovering opportunities to optimize the online presence and operations of startups and medium businesses across a range of industries.

Subscribe to our mailing list to learn about our new features and marketing tips & tricks.